R-16 and a Radiant Reflector (with R-13 Fiberglass Batt)
R-19 and a Radiant Reflector (with R-13 Fiberglass Batt and 0.75” Furring (on Back of Knee Wall))
Note: Installation instructions and illustrated drawings are recommendations only, while proper local construction methods are the responsibility of the installer.
This application is very effective for the Do-It-Yourselfer who has decided to expand their living space by finishing out an attic or an above garage area. The benefits provided by Reflectix® are three-fold: Our product provides increased R-values by being a Reflective Insulation and also by eliminating air flow into the back side of the batt (which reduces stated R-values). The third benefit addresses Radiant Heat Flow that the wall would ordinarily absorb (a big problem for Knee Walls). The 96% reflectivity of the product all but eliminates this heat transfer occurrence. The product has the added attraction of ease of handling and installation.
Recommended Products
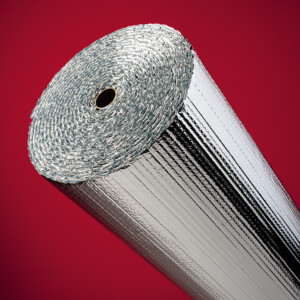
Double Reflective Insulation
Reflective/Bubble/Bubble/Reflective – Roll
- BP24050 (24” x 50’)
- BP24100 (24” x 100’)
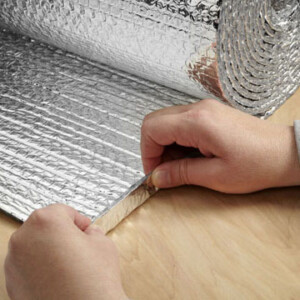
Staple Tab, Reflective/Bubble/Bubble/Reflective – Roll
- ST16050 (16” x 50’)
- ST16100 (16” x 100’)
- ST24050 (24” x 50’)
- ST24100 (24” x 100’)
Benefits
- R-16 (with R-13 fiberglass batt)
- R-19 (with R-13 fiberglass batt and 0.75” furring (on back of knee wall))
- Reflects 96% radiant energy back up into attic space
- Enhances performance of a typically installed system
- Increases comfort levels (by dramatic reduction in summer time heat gain)
- Installs quickly and easily
Installation Instructions
Installation Instruction pdf: PRO Knee Wall Installation Instructions 022025
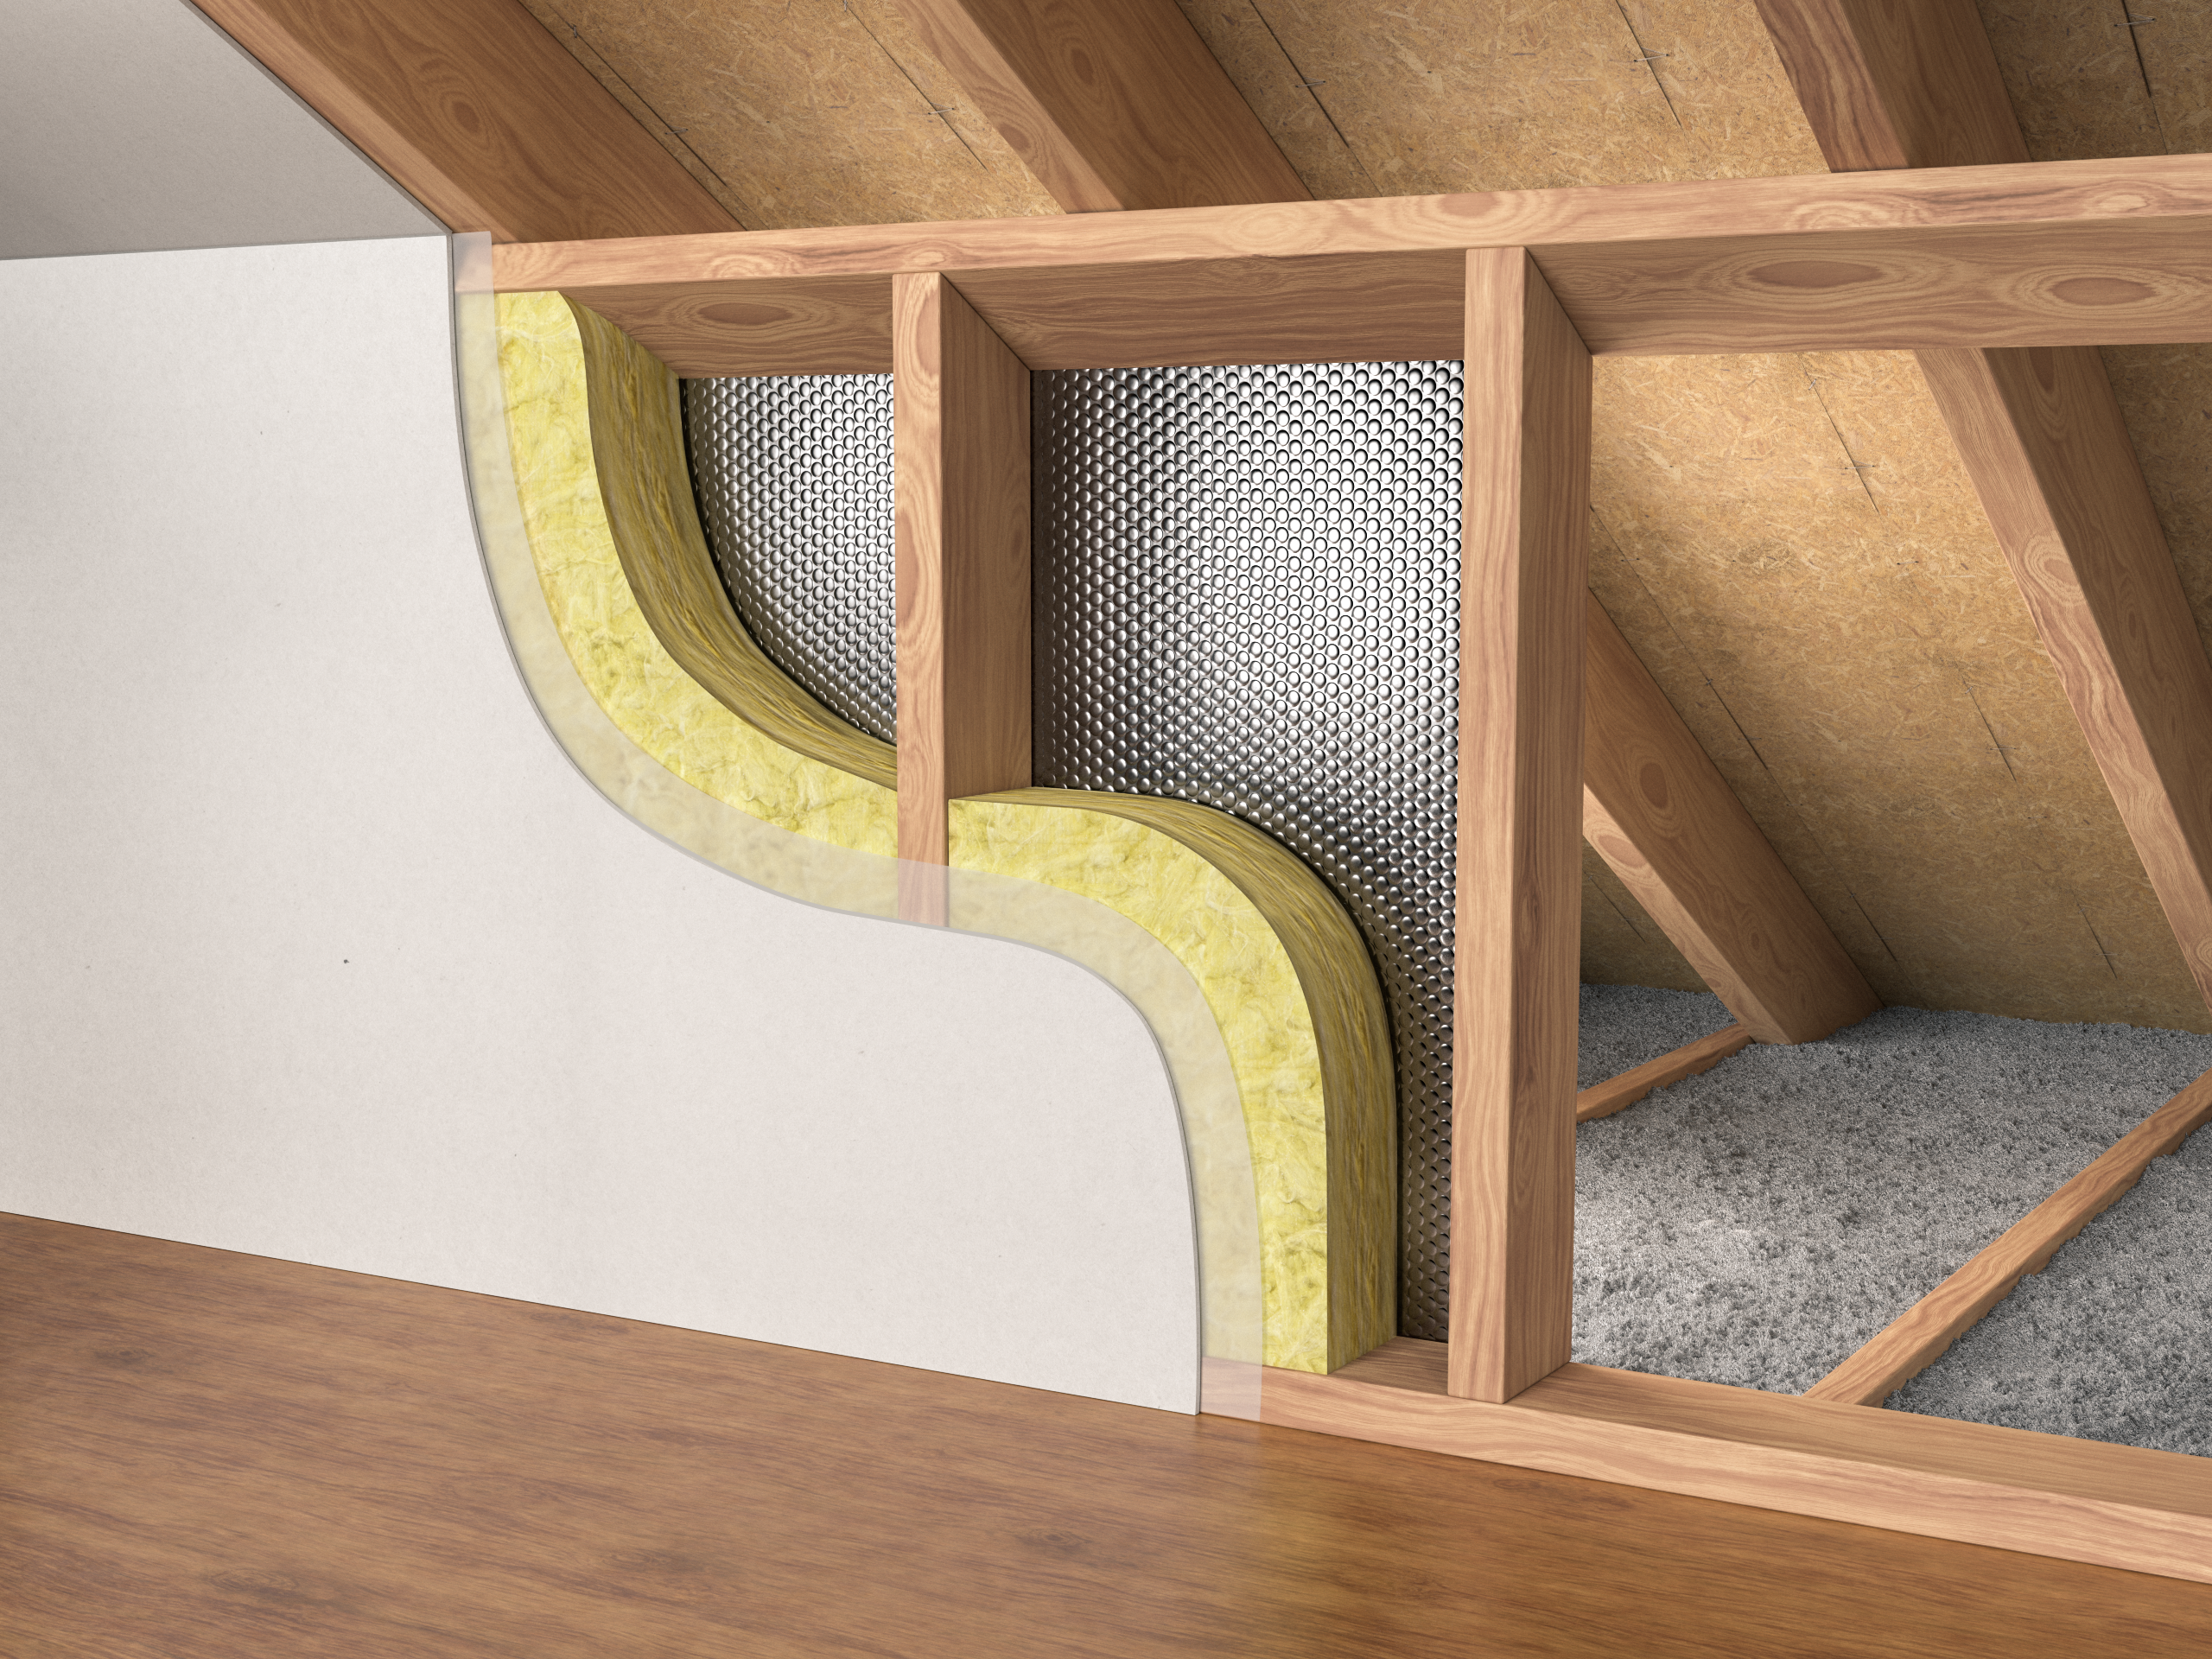
1. Product Installed in the Back of the Knee Wall Cavity – R-16 and a Radiant Reflector (with R-13 Fiberglass Batt)
- Construct Knee Wall per Building Code.
- Prior to installing fiberglass batts, measure the inside height of the knee wall cavity.
- Precut the Reflectix® to this measured length minus 1/2”.
- Start at the inside top of the first cavity.
- If utilizing the Reflective/Bubble/Bubble/Reflective, Staple Tab product, staple the tab of the product to the side of the stud and continue downward stapling every 3” to 4” – Repeat on opposite stud – The plane created by the product should be parallel to the back side faces of the studs – There should be a continuous 1/2” air gap across the bottom of the cavity.
- If utilizing the Reflective/Bubble/Bubble/Reflective product, staple the edge of the product to the back face of the stud, splitting the stud – Continue downward stapling every 3” to 4” – Repeat on opposite stud – The plane created by the product should be parallel to the back side faces of the studs – There should be a continuous 1/2” air gap across the bottom of the cavity.
- Install Fiberglass Batt per Manufacturer’s Instructions.
- Install a Vapor Barrier on the inside of the Knee Wall if your Building Code dictates.
- Finish interior of Knee Wall.
2. Product Installed in the Back of the Knee Wall Cavity – R-19 and a Radiant Reflector (with R-13 Fiberglass Batt and 0.75” furring (on the back of the Knee Wall))
- Prior to placing the Knee Wall and nailing it to the floor and rafters, attach a 1”x 2” (nominal) furring strip to the back of each Knee Wall Stud.
- Install Reflectix® per instruction in Method #1 (above).
Important
Review These Important Safety Guidelines Prior to Installation:
- ALWAYS check local building codes before installing Reflectix®.
- ALWAYS check the area you are insulating and make any needed repairs. Any worn wiring should be replaced before you begin installing Reflectix®.
- ALWAYS make sure work areas are well ventilated and well lighted.
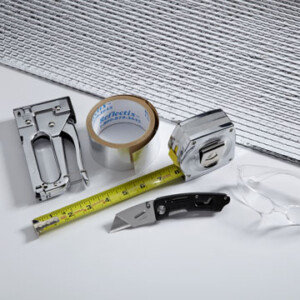
- ALWAYS use eye protection when operating a staple gun.
- ALWAYS use caution and common sense when using a staple gun. Be aware of electrical wiring locations. Stapling into a wire can cause severe shock or death. NEVER staple into electrical wiring.
- ALWAYS be careful when working with large pieces of Reflectix® on windy days.
- When installing Reflectix® on bright sunny days, it is best to wear sun glasses.
- Do not work in areas such as attics when temperatures are too hot.
- Please Note: The intention of these Installation Instructions and 3-D renderings are for the sole purpose of illustrating the correct location and relative position of the Reflectix® products in specific building assemblies. The correct construction methods and techniques are the responsibility of the installer or contractor. The methods outlined are recommendations on location of the Reflectix® products as a guideline. There are no claims on the part of Reflectix, Inc. that these building assemblies are finite standards or meet building code requirements (as they can vary by region).
Reflectix Fact Sheet per FTC
Testing and Certification
Reflectix® products are thoroughly tested at either nationally approved, independent laboratories or leading universities. Tests are performed to current American Society of Testing and Materials (ASTM) standards when a standard exists. To obtain a copy of our Product Testing Specifications, please refer to the “Additional Resources” tab. The documents are also available by e-mail at customerservice@reflectixinc.com or call (800) 879-3645.
Add'l Resources / Literature
Photos
Pictured: 1. Double Reflective Insulation, 2. Double Reflective Insulation with Staple Tab, 3. Tools for Installation