
The Reflectix Blog
Reflect on your application! Share it with us and receive a free gift! Click here for all Blog Posts.
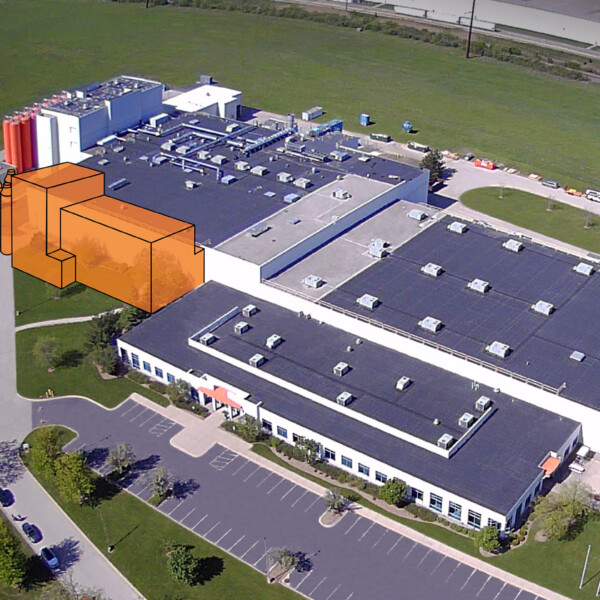
Balcan Innovations Announces $200 Million Investment in Strategic Growth & US Expansion
Balcan Innovations announced the completed installation of their new Windmoller & Hoelscher (W&H) printing press in Terrebonne, QC, serving as the first domino in a series of major investments in new extrusion, printing, and bag-making machinery destined for their Wisconsin and Quebec-based facilities. The company’s newly launched capex plan represents a $200 million commitment aimed…
(Read More)
ASTM / RIMA-I Verification Program – Press Release
Reflectix participates in the ASTM International/RIMA-I Verification Program for Reflective Insulative Materials. The Reflective Insulation family of products that have been certified within this program, have been evaluated against the requirements specified by ASTM C1224 “Standard Specification for Reflective Insulation for Building Construction Applications”. The program was established by the Safety Equipment Institute, which is…
(Read More)
The “Coolest Thing Made in Indiana” Competition!
Reflectix has entered into a contest for the Indiana Chamber of Commerce’s 2nd Annual “Coolest Thing Made in Indiana” Competition! Voting begins tomorrow, Thursday, November 3rd, and you can vote for Reflectix at this link: www.indianachamber.com/coolestthing fdsfds dfsafds
(Read More)An Article Shines the Spotlight on Balcan
Balcan Innovations, our parent company, earned a featured article in the latest issue of Canadian Plastics magazine, a national publication that shines a spotlight on business success stories while covering every aspect of the Canadian and North American plastics industry. The article is based on an interview conducted with our CEO, Dano Lister, and speaks…
(Read More)